
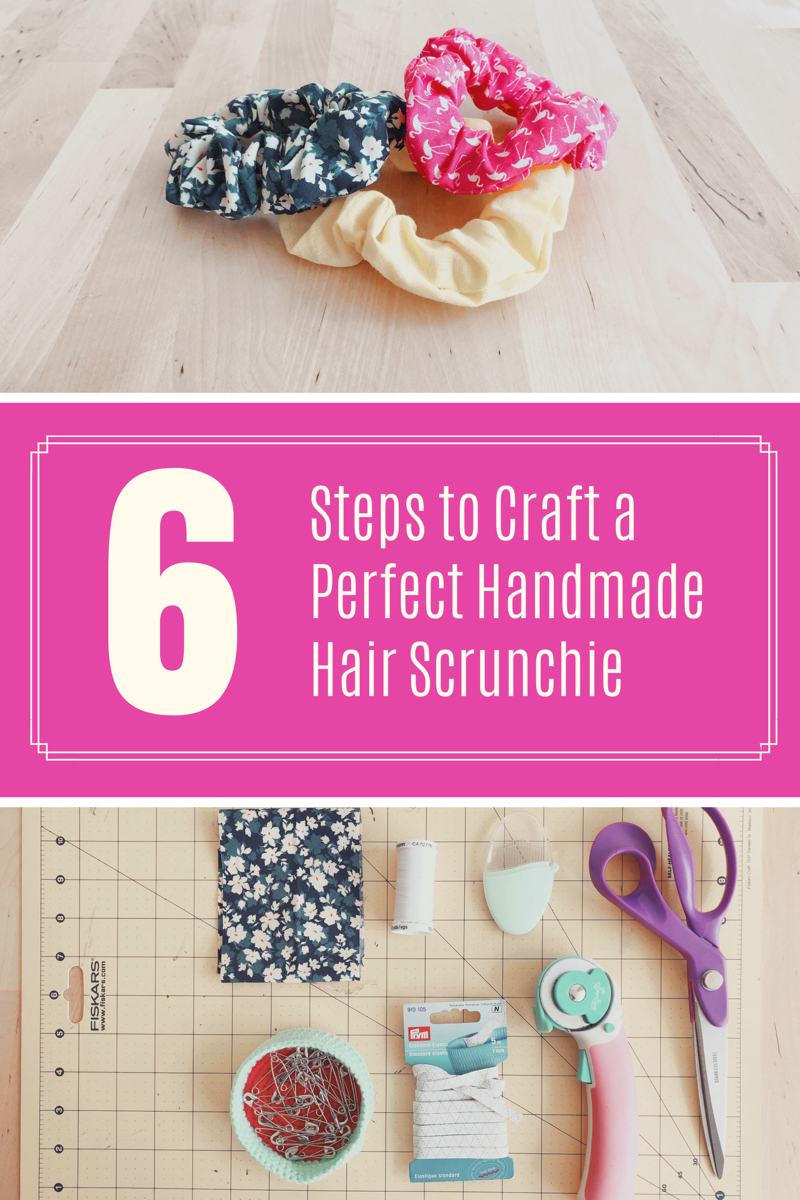
Last week at Bee Moor WI we met for a craft fest at our monthly meeting. We crafted leather keyrings, paper flowers, felt pictures, calligraphy and hair scrunchies.
Here’s everything you need to make your own hair scrunchie for yourself, or as the perfect handmade gift for someone you know.

WHAT YOU NEED:
- Fabric Scissors or Rotary Cutter & Cutting Mat
- Needle
- Thread
- Elastic (we used 7mm wide)
- Safety Pin
- Fabric (one fat quarter of fabric will make 6 scrunchies, to make it easier use a fabric with no pattern that looks the same on both sides)
HOW TO MAKE THE SCRUNCHIE:

1. Cut your fabric into an 18″ x 3.5″ (46cm x 9cm) strip, and cut a 8″ (20cm) peice of elastic.
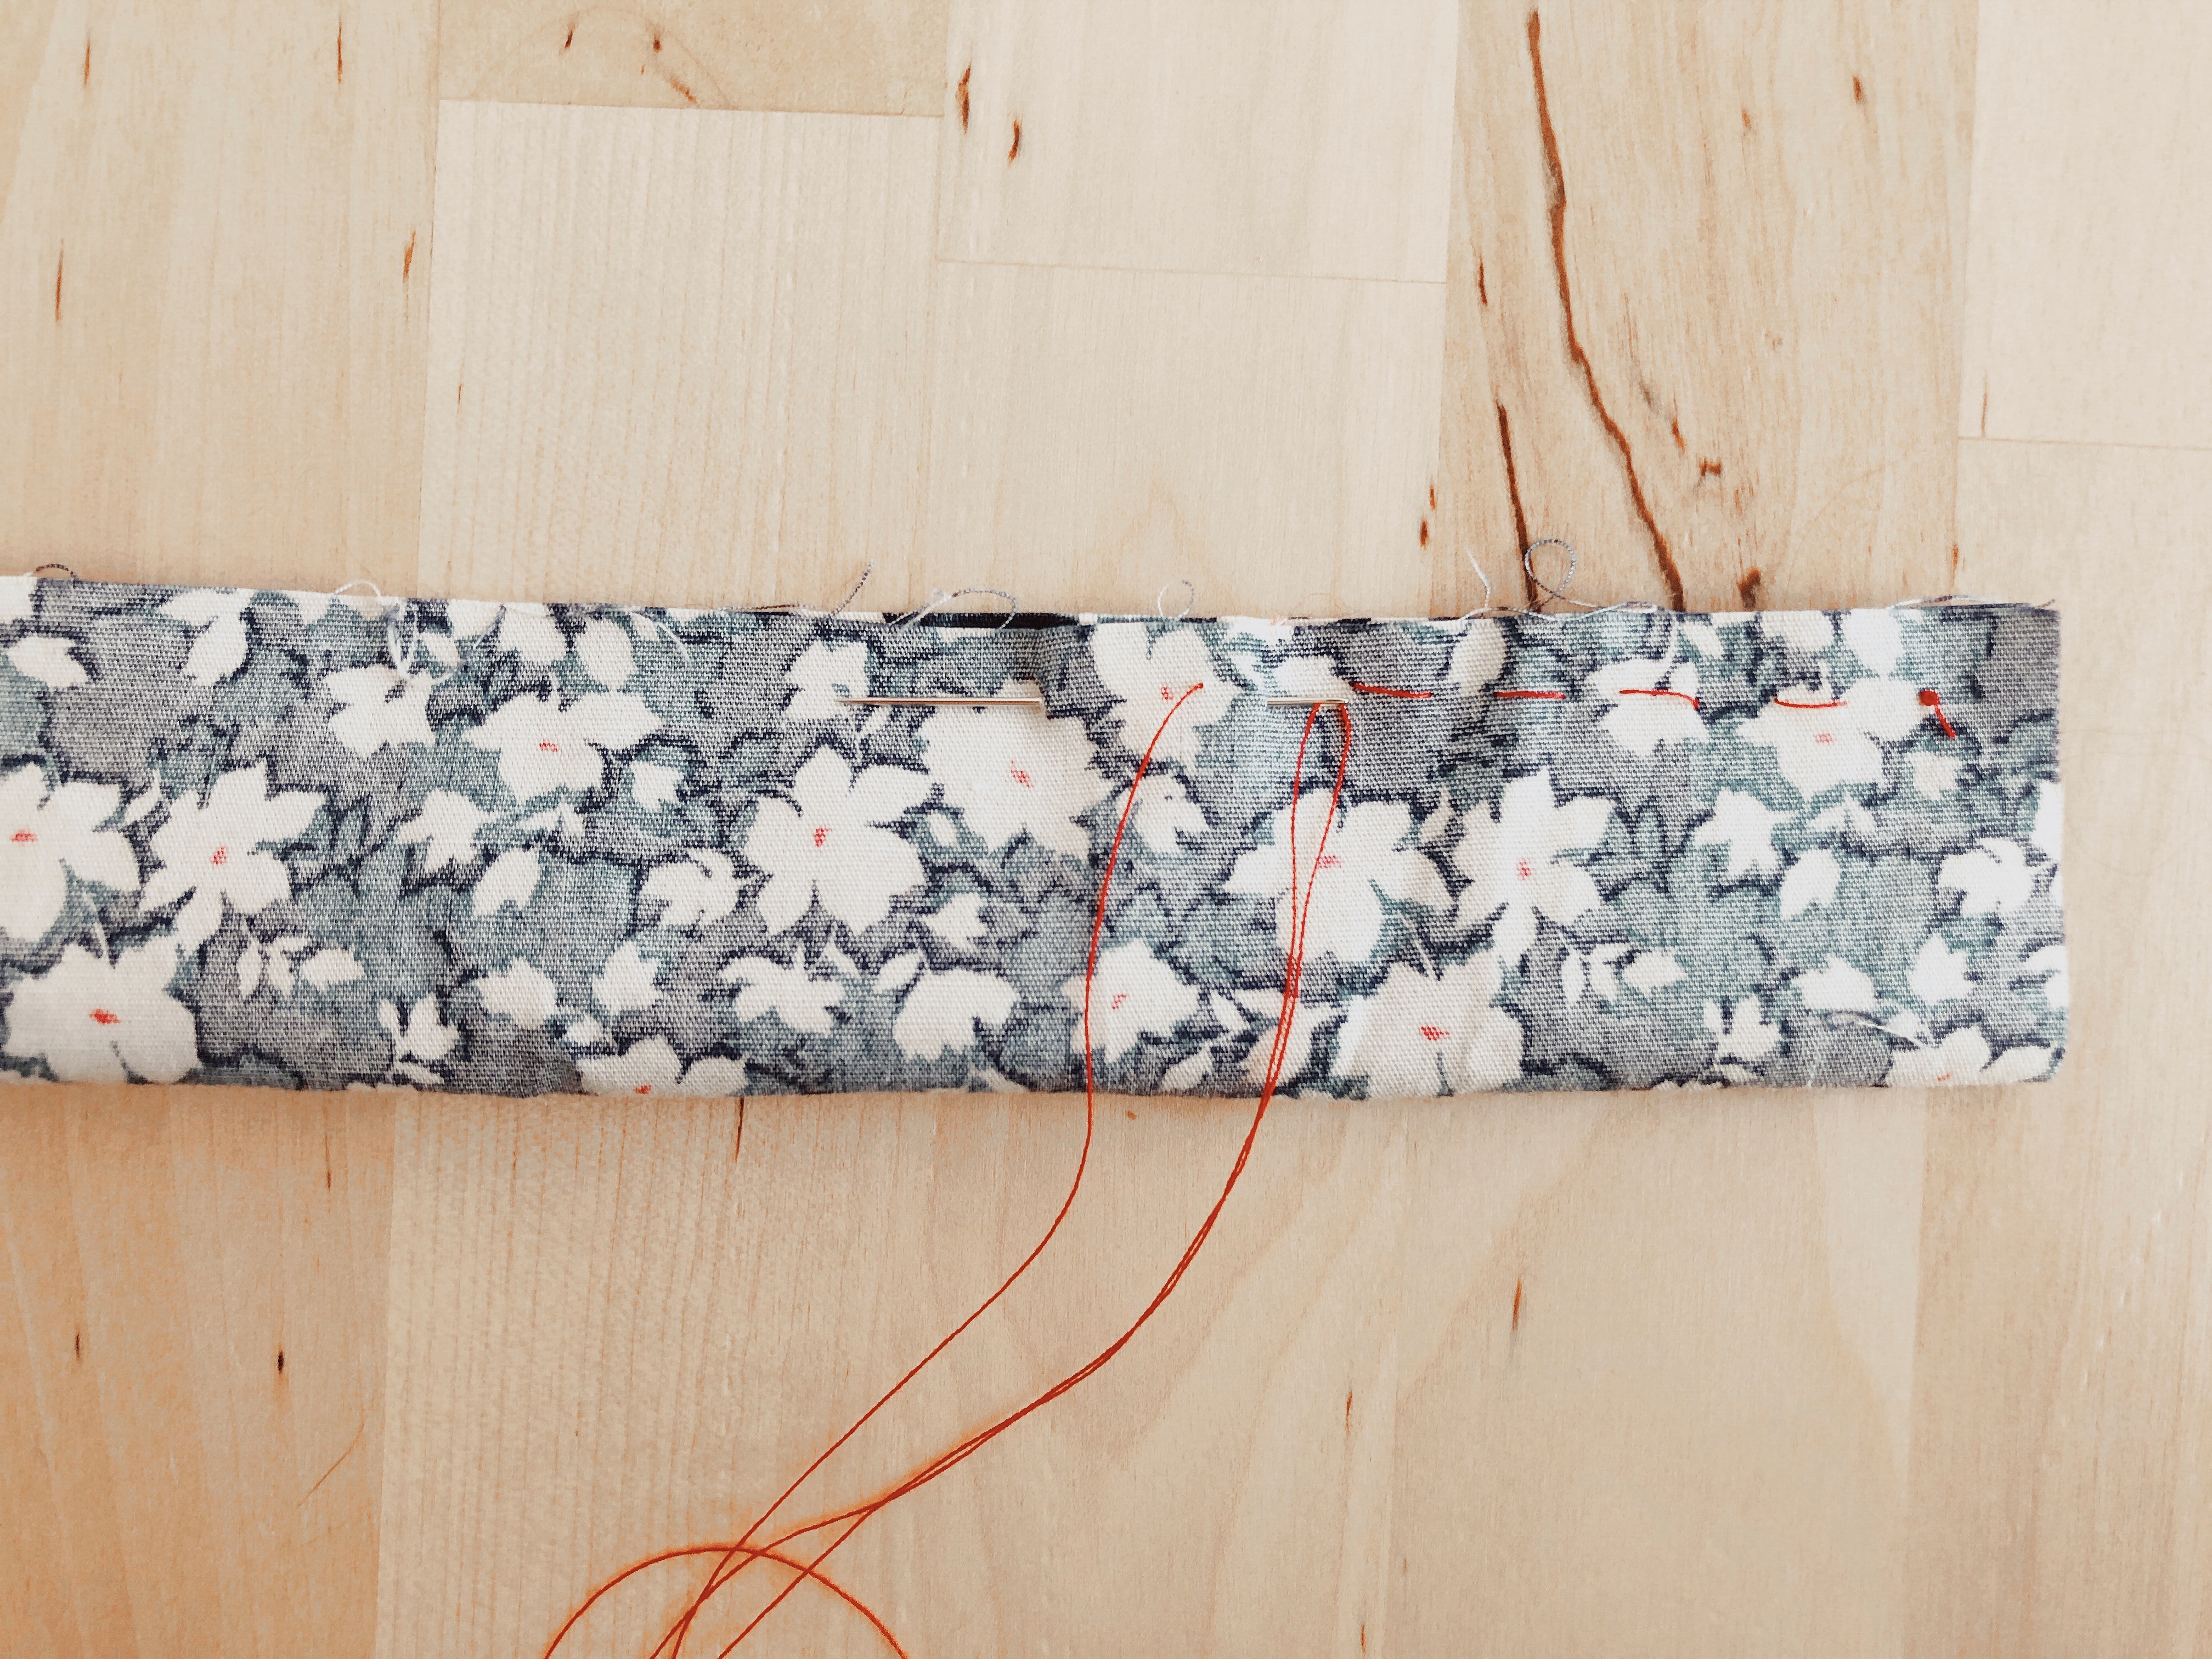
2. Fold the fabric in half so the two long sides come together and the fabric is inside out (right sides together). Hand sew along the long side to make a tunnel (we used a back stitch for extra strength). Finish the sewing with a strong knot close to the fabric.
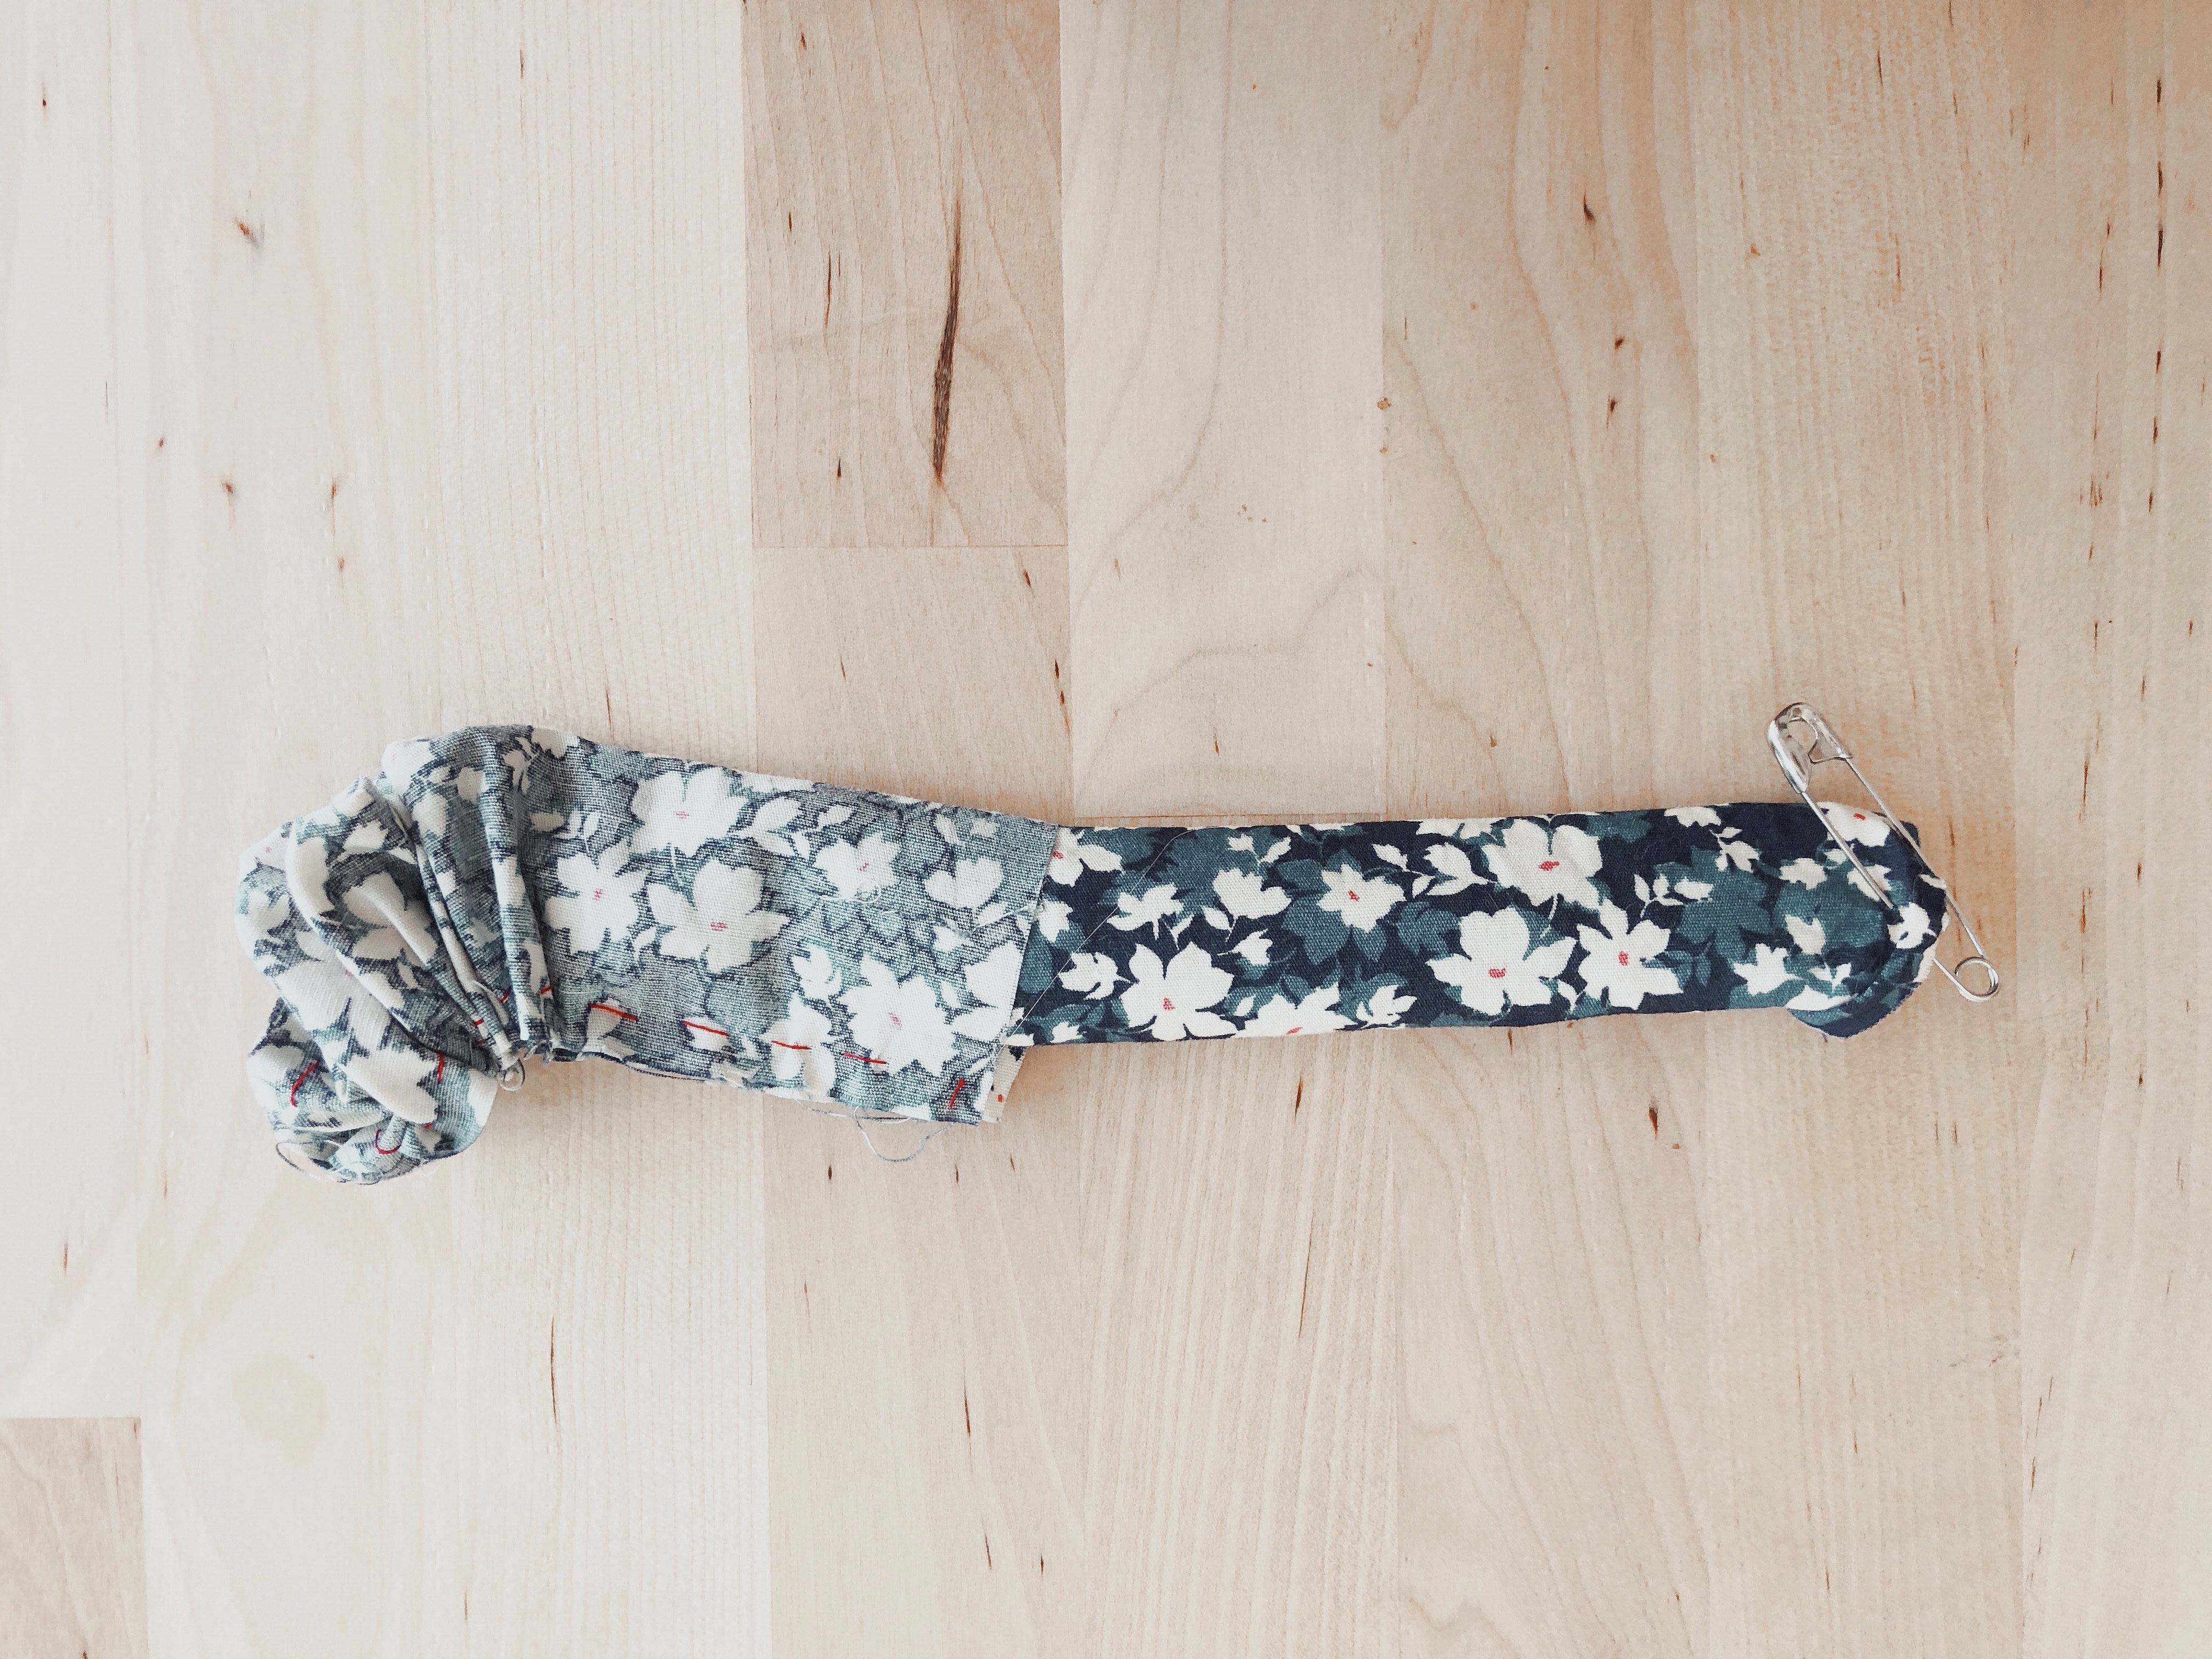
3. Turn the tunnel right side out by attaching a safety pin to one end of the tunnel and pushing the safety pin inside the tunnel until it comes out the other end. Once you see the end of the fabric emerge from the top of the tunnel, remove the safety pin, grab the end and gently pull it through so the fabric is right side out.

4. Use the safety pin again attached to the elastic, feed the safety pin through the scrunchie tunnel until it emerges out the end. Make sure you hold on to the other end of the elastic so you have two ends of the elastic pocking out of the fabric tunnel.
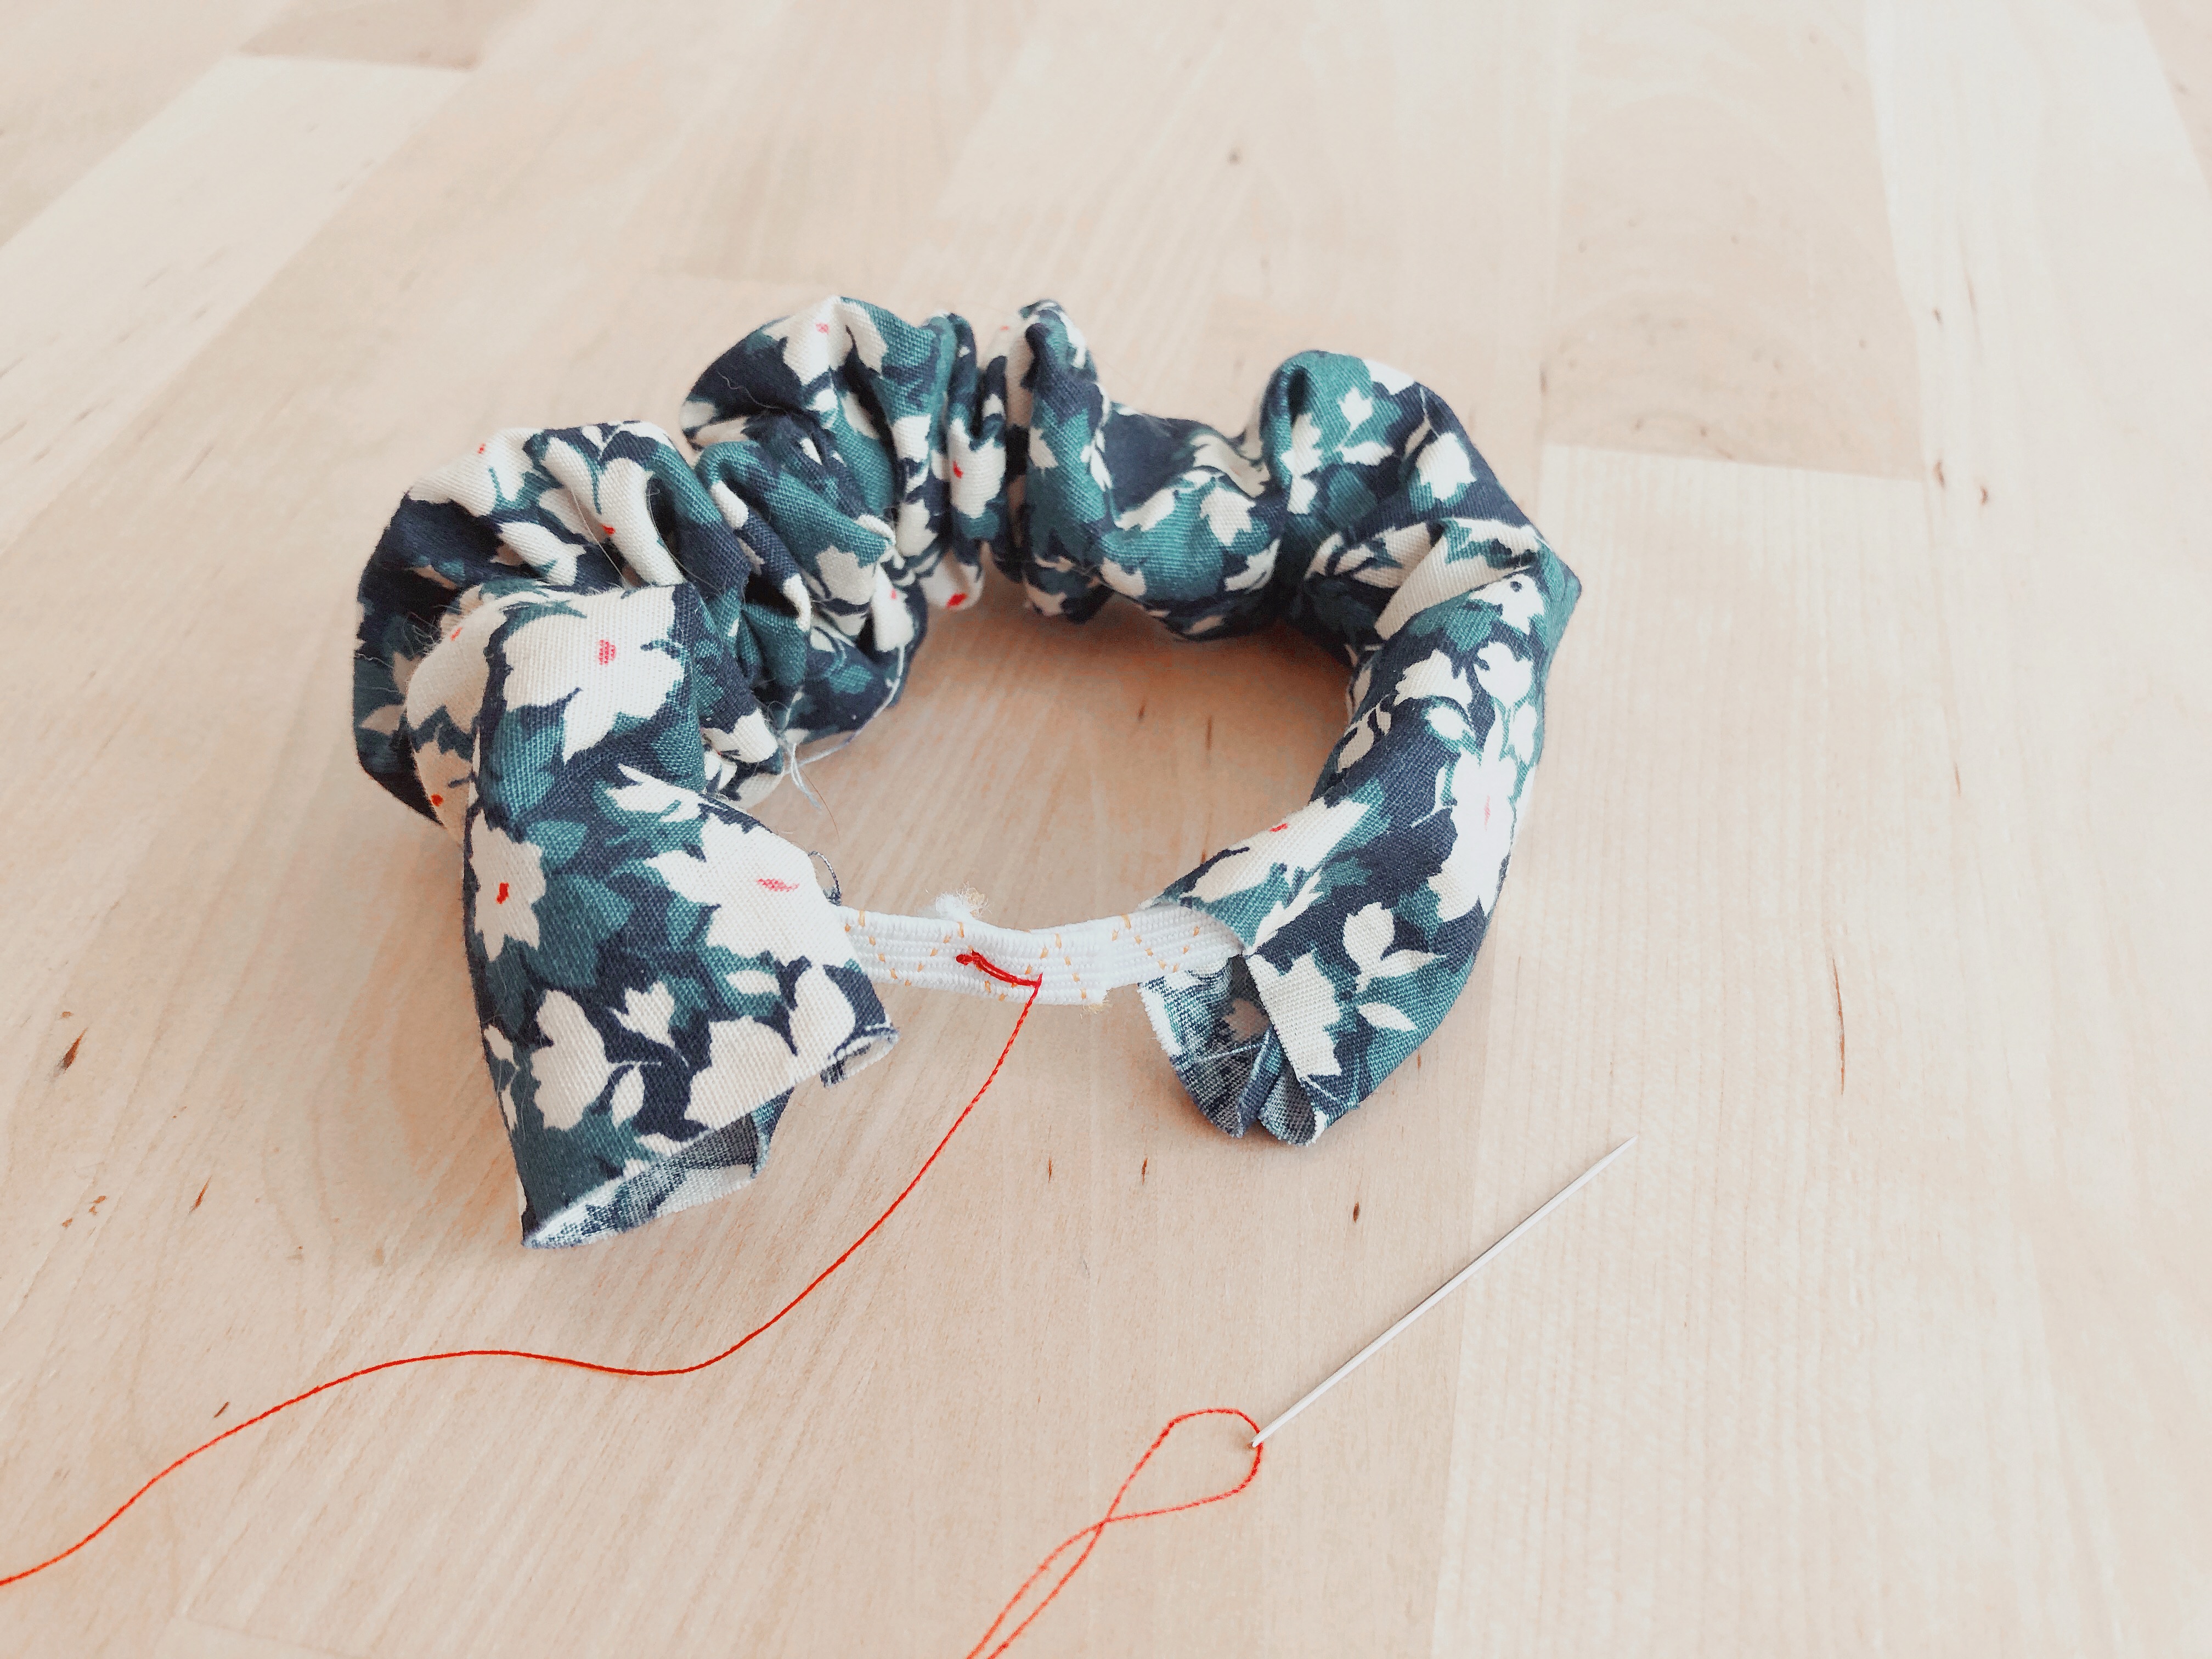
5. Overlap the ends of the elastic together to form a circle. Try to make sure the elastic isn’t twisted inside the tunnel. Hand sew a few stitches through the overlapped elastic so it is securely held together.

6. Take one end of the fabric tunnel and fold the edge of the fabric inside the tunnel by 1/4″ (1cm). Press your fingers together along the fold to make a neat folded edge. Now take the other end of the fabric tunnel and push it inside the neat edge. Hand sew around the folded edge, catching the other end of the tunnel with the stitches to close the loop of fabric (we used a slip stitch). Finish the sewing with a strong knot close to the fabric. Spread out the scrunchieness along the elastic and check for anywhere you might need a few extra stitches.

Congratulations! Now you can make one in every colour, or one for every friend. Leave a comment below to tell us how you wear yours.
